One of the apps offered in the free and open-source LibreOffice suite is called Base. Base is a front end application for creating, connecting to, or reading databases (including those created with Microsoft Access). This guide will walk you through the process of using Base to create a simple but useful database of your own and start entering data.
1. Install LibreOffice Base
The LibreOffice suite, an alternative to the Microsoft Office suite, is available for Windows, macOS, and Linux. There are several ways to install it on your system (particularly if you’re a Linux user) but you can download the official installation packages at libreoffice.org/download. In this article, we’ll be using LibreOffice version 7.0.2.2.
2. Launch Base and Create a Database

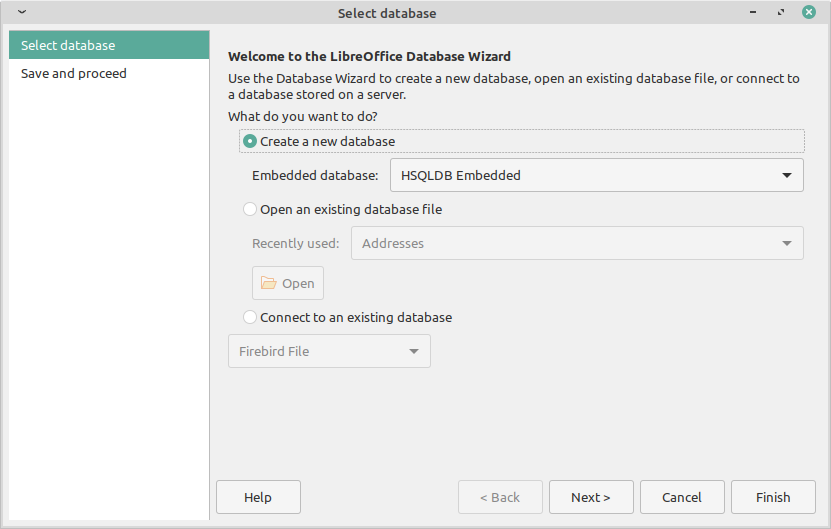
Once LibreOffice is installed, launch Base from your desktop. Every time you open Base, you’ll see this dialog, asking you if you want to start a new database or open an existing one. Select the Create a new database radio button.
Base comes with a relational database management system called HSQLDB (HyperSQL Database Management System) that’s ready to use and is the default option.
HSQLDB is ideal for your first project, as it’s simple and easy to handle. Make sure the HSQLDB Embedded option is selected from the list and click the Next > button.
3. Register and Save Your Database
Base will ask you if you want to register the database. Registering simply makes your database accessible to other apps in the LibreOffice suite on your device, such as Calc and Writer. This function is local to your device—you don’t need to worry about it being accessible by anyone else.
Unless you’re certain you’ll never want to access your new database with those other apps, it’s safe to leave Yes, register the database for me selected.
Make sure you’ve selected Open the database for editing and then click Finish. Base will prompt you to save your database as an .ODF file. Choose a location and file name for it and click Save.
4. Create a Table and Set a Primary Key
The first thing you’ll need to do with a new database is to create a table. Tables are the most essential part of a database, and you need at least one in order to accomplish anything.
The default view when opening a database is the Tables section. Select Create Table in Design View… from the task menu.
The Table Design dialog will open with several empty cells under the labels Field Name, Field Type, and Description. This is where you’ll choose and name the fields you want in your table.
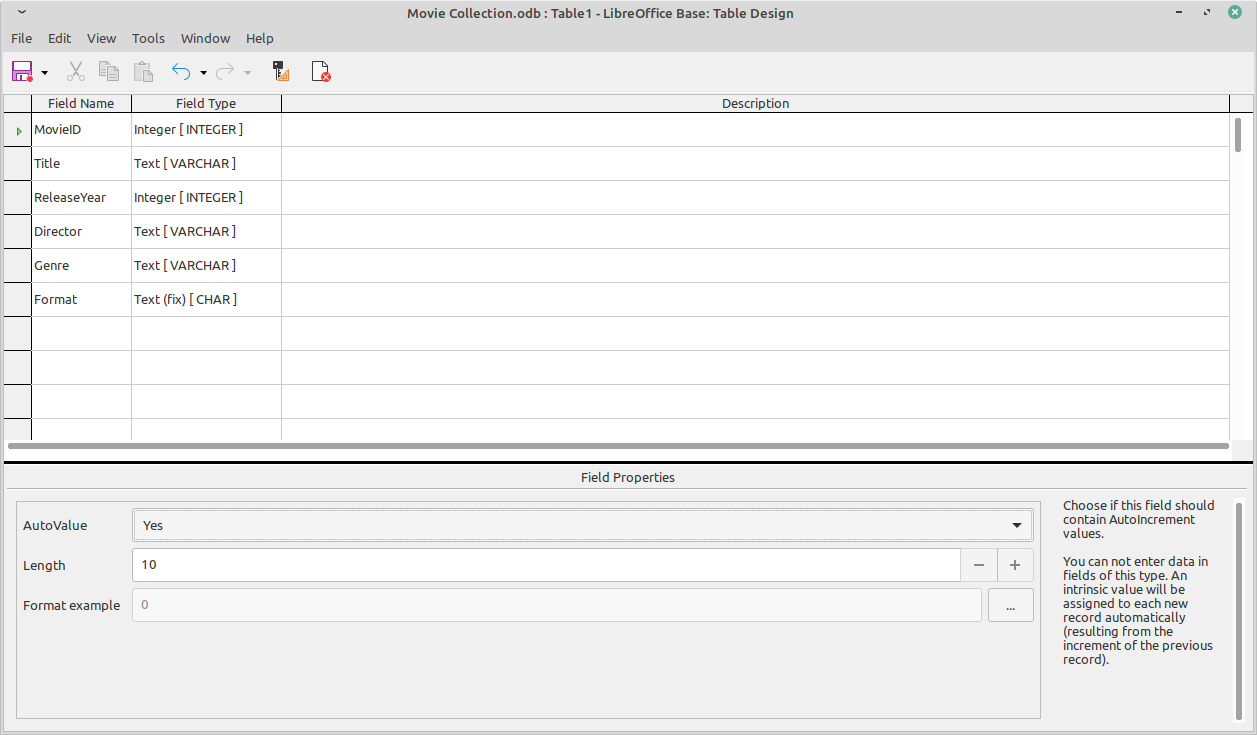
These are the different “categories” of data you plan to enter into your database. As an example, we plan to build a database of our movie collection, so we’ll include fields like Title, Director, and ReleaseYear.

The first field you should create, however, should be some kind of unique identifier, like a number or a UPC code. This field will differentiate each entry, even if all the other fields have duplicate data. In our example, we’ve named the first field MovieID and selected field type Integer [INTEGER] to make that field a simple number.
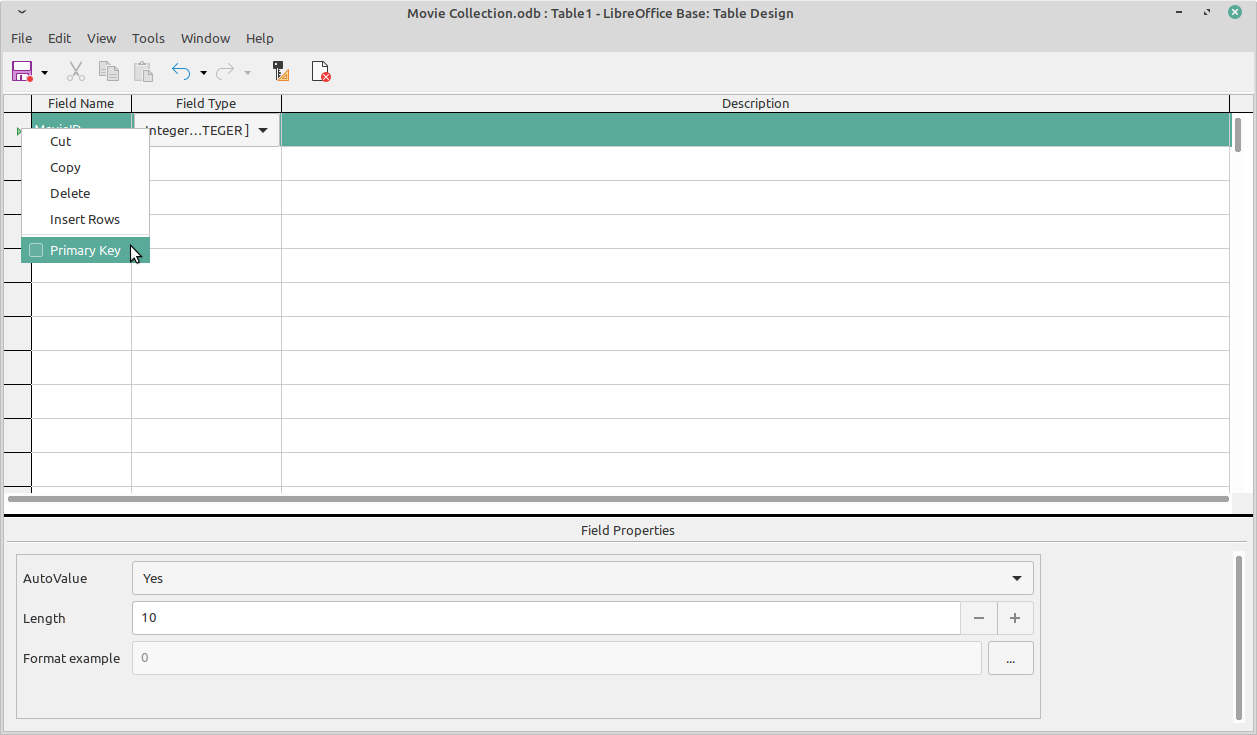
Whatever you end up making the identifying field, right click on that row and check the Primary Key box in the dropdown menu. If you don’t select a field as your primary key, Base will throw an error when you try to save the table.
In our example, under Field Properties, we’ve also set the AutoValue option for our primary key field to Yes so that we don’t have to manually choose a new ID number every time we create an entry. With the AutoValue function, Base will automatically enter the next incremental number for each new entry.
5. Complete Your Data Fields
Continue adding as many fields as you need, and make sure you select appropriate field types. For most basic uses, you’ll want to use VARCHAR for text, INTEGER for numbers, and DATE for calendar dates.

If you already have data in a spreadsheet or .csv file you plan on importing to your database, it’s very helpful as you’re adding fields that you make sure the names of your fields are easily matched to the names of fields in your data file.
Be aware that the fields you create can be rearranged when initially creating a table, but you cannot rearrange fields after saving the table. This shouldn’t cause you any major problems, however, and you can still add and delete fields later.
6. Save Your First Table
Click the save button or hit Ctrl+S to save your table, and Base will prompt you to name your table. Choose whatever name you’d like (we chose the default, Table1, in our example).
After you’ve saved the table, make sure you save the database file itself to ensure you don’t lose your work. Your .ODF file will need to be saved any time you create or edit a table, query, form, or report.
If you ever need to edit the fields in your table, you must right-click on the table and click Edit from the dropdown menu.
7. Enter or Import Data
Now that you have a table, your table needs data. There are several ways you can get data into your database, but today we’ll look at how to enter it manually in the table view and how to import from a spreadsheet.
Manual Entry
Double-click on your table, or right click and select Open. In this dialog, you’ll see all the fields you just created. You can manually create entries by entering data one field at a time, much like entering information into spreadsheet cells.

When you reach the final field for an entry, hit Tab to move on to the next entry. Base will automatically save the data you entered, so you don’t have to click the save button every time you enter data. In addition, if you set the ID field to AutoValue, Base will automatically fill in the ID field for you when you tab to the next entry.
Continue on until you’ve entered all the data you want.
Import from a Spreadsheet
If you have a spreadsheet that already has the data you want to enter, you can import it into your table easily, although you must follow a few rules.
To import from a spreadsheet you need to have a column for each field you have in your table, even if the field is set to AutoValue or you don’t have any data for it yet. In addition, data must be present in each row of each column you’re importing whose destination is not set to AutoValue.

In our example, there’s a column with roughly the same name for each field in our table, and all rows are filled except for the rows in the ID field, which Base will auto-fill when we import. The names don’t need to match up exactly, and the columns don’t need to be in the same order as your database fields; you’ll have a chance to rearrange your data during the import.
To start importing, highlight all the data in your spreadsheet you want to import, including the labels for each column, and copy it with Ctrl + C.
Then, open Base and make sure you’re on the Table view screen. Click Edit > Paste or hit Ctrl+V. This will open the Copy table dialog box. Leave the options as they are and click the Next > button.

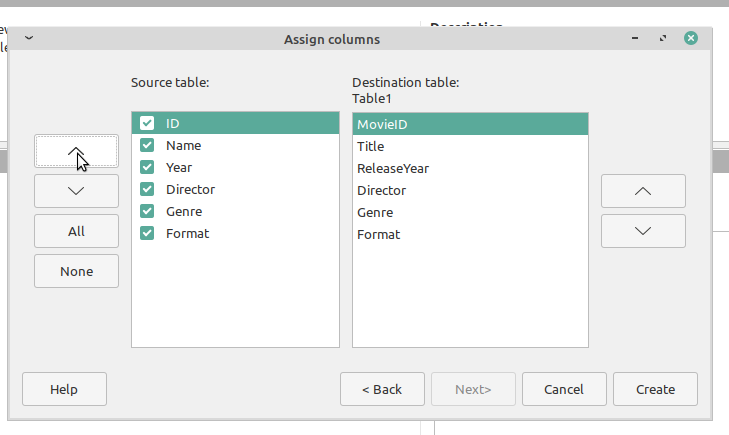
In the Assign columns dialog box, you’ll need to align the columns you’re importing with the fields in your table. Use the up and down buttons to adjust each column’s position, and uncheck any columns you copied that you don’t want to import. Click the Create button when you’re done.
If there were no errors during importing, the dialog box will simply close and return you to the main table view. Double-click on your table to view the data and check that nothing was incorrectly imported.
A Database Ready for Action
Congratulations! Now that you’ve gone through the process of creating a database, building a table, and entering data, you have a usable database file at your fingertips. Some additional tasks you can do in Base are run queries in SQL, design forms, and create reports with your database.


