Even if you have an iPhone with the maximum amount of available storage, there may come a time when your device gets filled with photos. If that happens, it’s time to transfer them somewhere safe to free up space.
We’ll show you the easiest ways to back up your iPhone photos to a Mac.
1. Move Pictures Using the Photos App
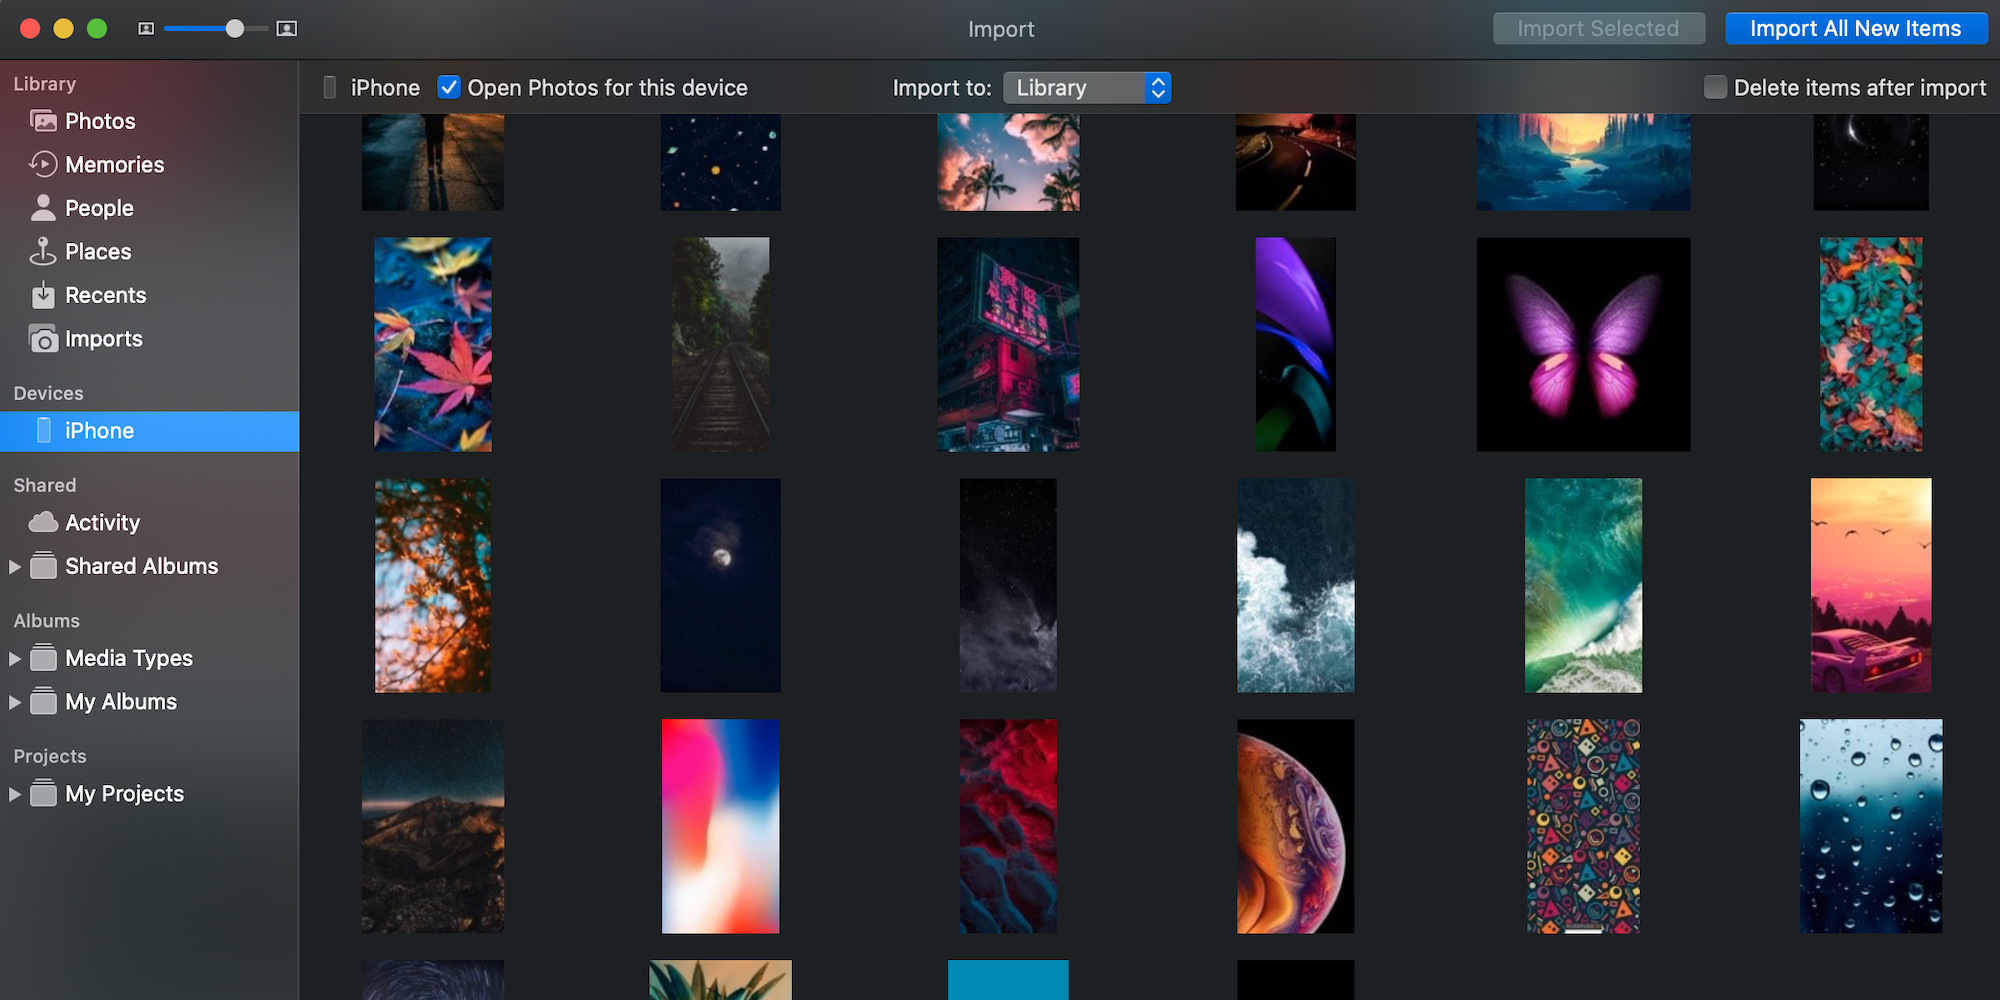
One of the most convenient ways of exporting photo and video files from an iPhone to a MacBook is via Photos. It’s the most reliable method since it uses a USB cable instead of wireless means.
Here’s what you need to do:
- Find your USB cable and use it to connect your iPhone to your MacBook.
- The Photos app should automatically open on your Mac. If it doesn’t, simply click on the app’s icon in your Dock (or search for it using Spotlight with Cmd + Space).
- The left-side column shows the list of the devices connected to your Mac. Search for your iPhone’s name and click on it. It may take a couple of seconds for the photos to show up on your Mac’s screen.
- Next to Import to, you’ll see a dropdown menu. You can use it to choose whether you want to add the photos to the library, an existing album, or create a new album.
- Choose Import All New Items to save all your photos to your Mac. If you want to transfer only a couple of photos, just click on the needed ones. To select many, click on the first one and drag your mouse over the others.
- Click Import Selected when you’re ready.

2. Transfer Photos Using iCloud
Another simple way to sync photos from an iPhone to a MacBook is via iCloud. Enabling the iCloud Photos feature allows you to store all the images in your iCloud account instead of on your phone only.
But keep in mind that iCloud only offers 5GB of space used for free. If you have more photos and need more space, you’ll need to upgrade your plan. You can select from 50GB, 200GB, or 2TB of storage.
Here’s how to enable iCloud Photos on your iPhone and transfer the photos:
- Open the Settings app on your phone.
- Scroll down and tap on Photos.
- Toggle on iCloud Photos. This will automatically sync your gallery to iCloud.
- If your iCloud account doesn’t have enough space, you will see a popup window asking to upgrade your storage capacity. Choose Upgrade Options and select the most suitable plan for your needs.
This isn’t all. You also need to set up iCloud Photo Library on your Mac, which you can do by following these steps:
- Launch the Photos app on your Mac.
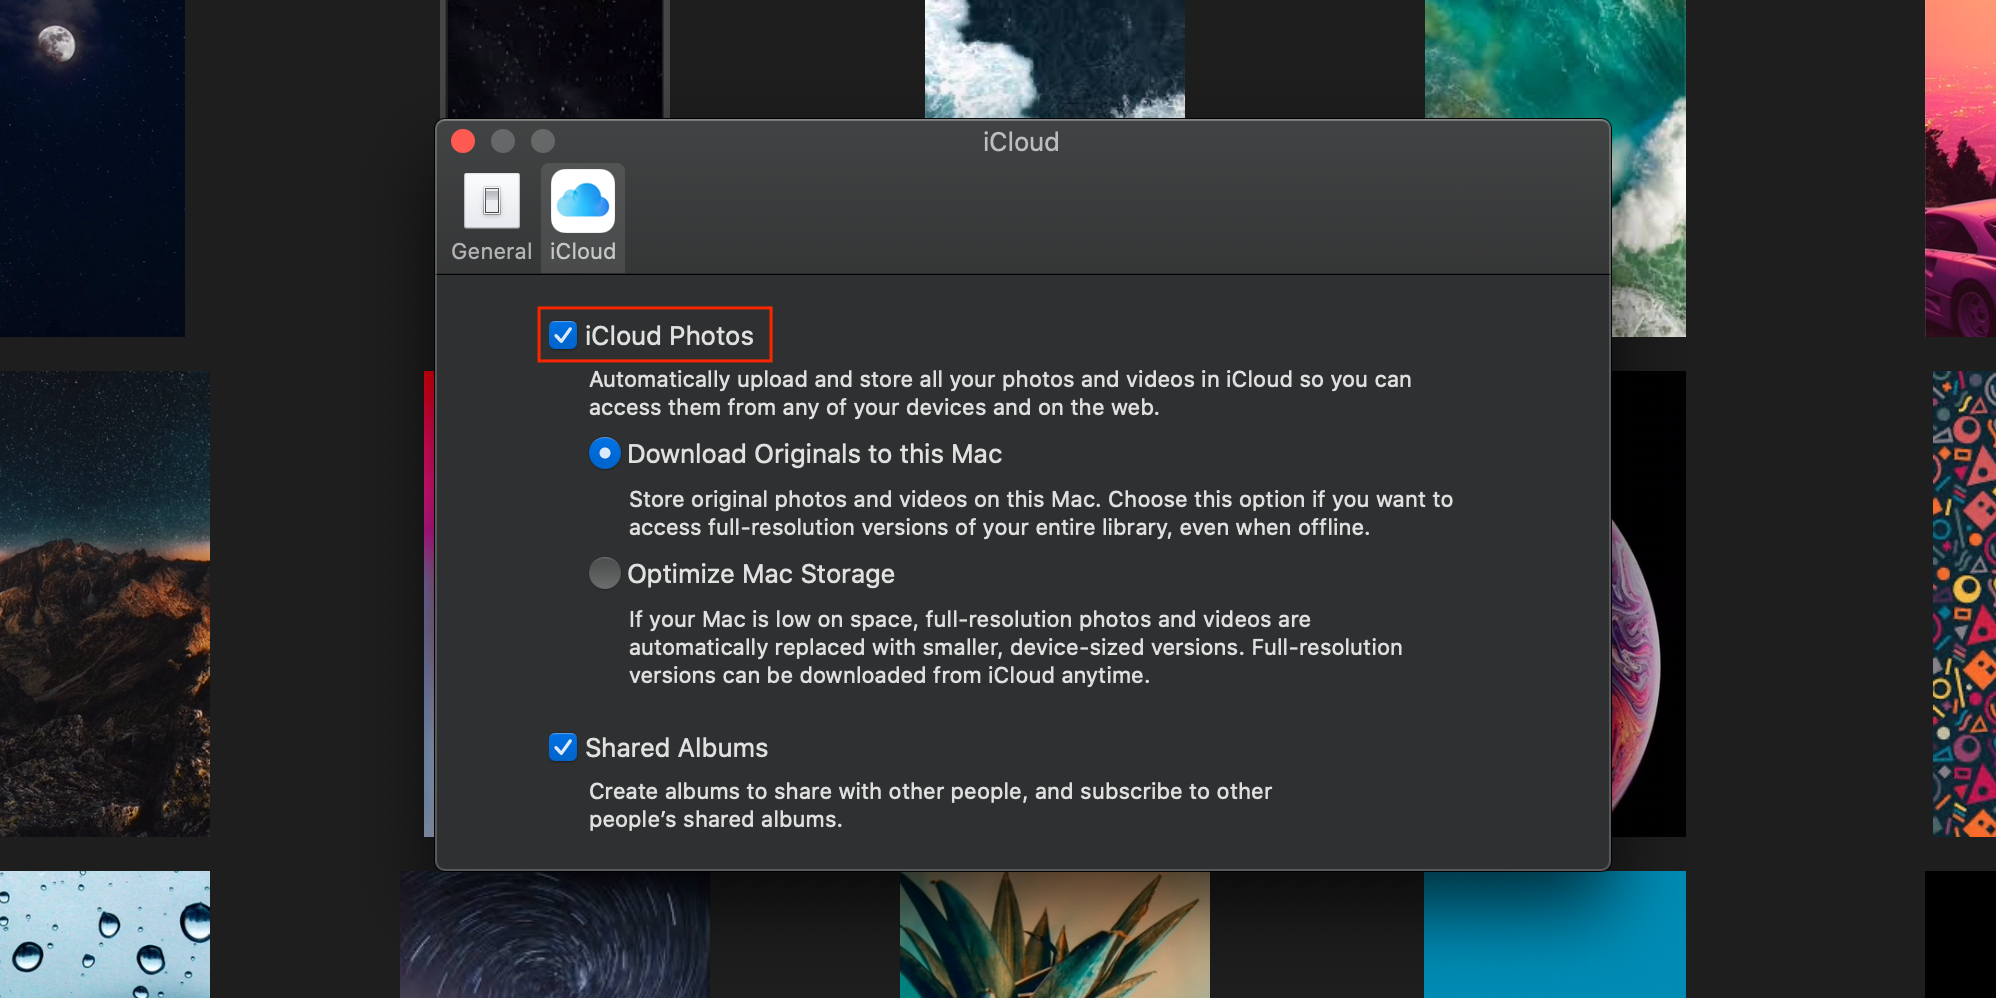
- From the menu bar at the top of your screen, select Photos and click on Preferences.
- Go to the iCloud tab and click Continue to sign in to your account.
- Put a checkmark next to iCloud Photos to enable it.

Once you complete this last step, your photos should sync automatically across the two devices. Now every time you take a new photo, it will appear on your Mac as well.
Remember that you need to switch off iCloud Photos sync before deleting the images from your phone. If you fail to do this, the photos will be erased both from your phone and cloud storage.
3. Transfer Photos Using AirDrop
AirDrop is a handy feature that allows Apple users to share photos, videos, documents, and other files across devices. Before using this wireless method, you must make sure that your Mac has AirDrop set up.
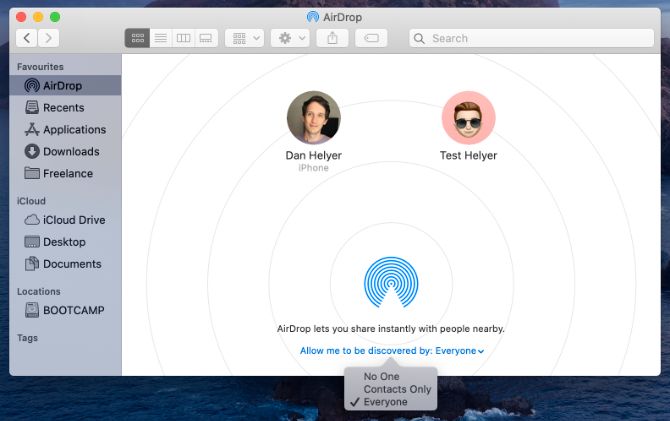
To make your Mac discoverable for AirDrop use, first open Finder. At the top of the lef column, find AirDrop and click on it. Then look for Allow me to be discovered by at the bottom of the screen and select Everyone.

Make sure that you connect both of your devices to the same Wi-Fi network.
Now, let’s get to the main steps:
- Launch the Photos app on your iPhone and open the needed photo album.
- At the top-right corner, find Select and tap on it.
- Tap on the photos that you want to transfer. If you see a checkmark, it means that the picture has been selected.
- Hit the Share icon at the bottom-left of the app’s screen and choose AirDrop.
- You will see a list of all devices that are available for sharing. Select your MacBook’s name.
- A popup window will show at the top-right of your Mac’s screen. Click on Accept and choose whether you want to open them in Photos or Save to downloads.
4. Transfer Photos Using Other Cloud Storage
There are many other useful cloud storage options for moving photos from your iPhone to Mac besides iCloud.
Google Photos is a favorite for backing up photos from any device. Unfortunately, after June 2021, the service will no longer offer its trademark unlimited high-quality storage. Everything you upload will count against your 15GB of storage shared across Google Photos, Gmail, and Google Drive.
However, you can upgrade your plan when needed (up to 30TB) using Google One. To use it for photo transfer, just download the Google Photos app for iOS, enable the backup option, and tweak your settings if you want to exclude some images.
OneDrive offers 5GB of storage for free; Microsoft 365 subscribers get 1TB of space. You need to install the OneDrive app on your device and have a Microsoft account to sign in. Then allow the app to access your photos and turn on Camera Upload. After this, you’ll be able to access your photos from any other device by signing in to your account.
Dropbox is another reliable option for storing files. Unfortunately, the free plan comes with just 2GB of storage space, but there are other plans if you need more. Like the others, using Camera Upload lets you automatically sync your iPhone pictures to your account.
Download: Google Photos for iOS | Mac (Free, subscription available)
Download: OneDrive for iOS | Mac (Free, subscription available)
Download: Dropbox for iOS | Mac (Free, subscription available)
Store Your Photos in a Safe Place
Nobody likes to think about their photos disappearing. It’s always best to store the photos in at least two places to keep them safe.
And all of the methods discussed here to transfer your photos from iPhone to Mac are reliable and simple to use. You’ll be glad you kept these memories in more than one location.
Image Credit: cottonbro/Pexels


