The arrival of Ubuntu 18.04 LTS means anyone installing it can enjoy five years of long term support (LTS) from Canonical.
We’ve already given you reasons to upgrade to Ubuntu 18.04 LTS. Now here’s a look at some of the better new features you can enjoy with the latest release of the ultimate Linux distribution.
1. The New Desktop Layout

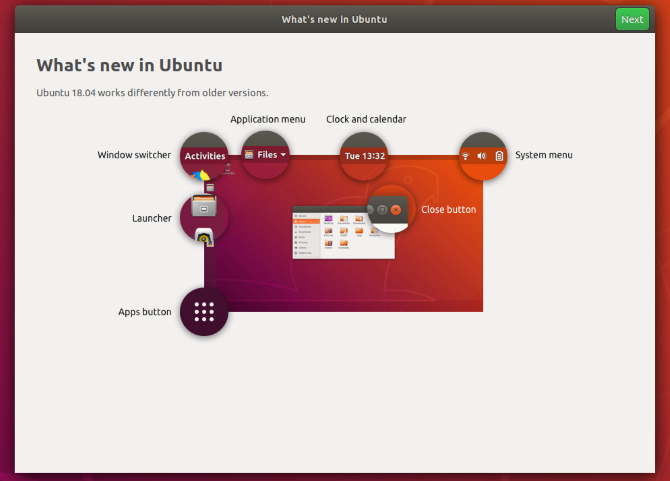
A whole bunch of new features are available on the GNOME 3.0-based Ubuntu desktop, which are explained in the new welcome screen.
“What’s new in Ubuntu” demonstrates how “Ubuntu 18.04 works differently from older versions.” Here’s how:
- Activities: This is the window switcher, which has a few hidden options, which we look at below.
- Application menu: The menu for the currently open window or app.
- Clock and calendar: Displays the current day and time. Click to view a more detailed calendar.
- System menu: Here you’ll find connectivity status, volume control, battery indicator, etc.
- Launcher: By default on the left of the display, this can be moved to different positions around the desktop. Preferred apps can be pinned and launched from here.
- Apps button: Click this to view a list of installed apps. Two views are available; one displays all installed apps, while the other only shows the ones you use regularly.
Depending on what version of Ubuntu you’re upgrading from, these developments may seem a little disconcerting. Fortunately, they make total sense, and you’ll soon be using these new features without a second thought.
2. Middle Click Your Mouse!
On a mouse with a scroll wheel, you’ll usually find that this can be pressed down, giving you a “middle click”. Sometimes clicking the left mouse button and right mouse button together gives the same effect.
Most touchpads nowadays also have a middle button, and modern touchpads can even accept gestures like the three-finger tap, which equates to a middle click.
Ubuntu 18.04 LTS features middle click support, offering a number of shortcuts through the user interface. These include:
- Opening a new application window by clicking on the app icon.
- Open a link in a new browser tab.
- View the contents of a folder in a new tab. You can also launch a program with a single middle button click.
Individual applications can have (and do support) other options for the middle mouse button.
3. Easier App Installation With PPAs
Installing PPAs has always required the use of three sets of commands:
sudo apt-get-repository ppa:[ppa url] sudo apt update sudo apt install [app]The first command adds the new repository, the second updates the repositories list, and the third installs the app. Streamlining the process, Ubuntu 18.04 LTS automatically runs the update command, so now all you need to enter is:
sudo apt-get-repository ppa:[ppa url] sudo apt install [app]While it was never the slowest process to begin with, losing that update command will conveniently save you a bit of time.
4. Faster and Minimal Install Option

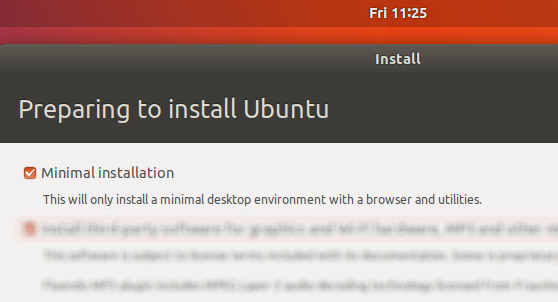
When you’re installing Ubuntu 18.04 LTS, you have the option of a Minimal Install.
This option is first in the list, and is distinct from installing third party software for graphics, Wi-Fi hardware, etc. It’s also distinct from the option to download updates while installing (although it can be combined with this option).
Minimal install, as you might have guessed, installs the bare minimum of options for Ubuntu 18.04 LTS. Free of bloatware, it lets you install just the applications you want to use. This has several benefits, the main one being that installing Ubuntu is far quicker without also installing the extra software.
5. Use the Activities Overview

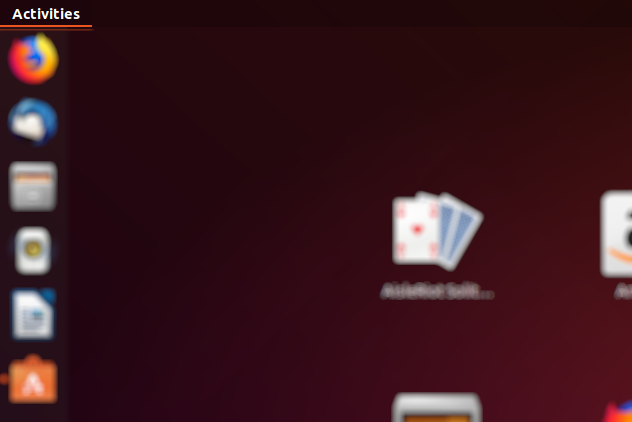
The Activities overview can be opened by clicking the Activities link, by moving the mouse to the top-left “hot” corner area, or by pressing the Super key (on a Windows-originating device, this is the Windows key).
You can do several things with Activities, from seeing open tasks to viewing system information.
For instance, although the whole Ubuntu family has been upgraded to Ubuntu 18.04 LTS, the default desktop is based on GNOME 3.0. In order to check which version of GNOME your system is running, click Activities (in the top-left corner) and type “about”.
Click on the About option to open, which displays information about your system, including the distribution’s name and GNOME version.
6. Easier Screenshots and Screen Recordings
GNOME screenshot has been upgraded, which means that Ubuntu 18.04 LTS features the easiest screenshot and screen recording options on any operating system!
To take a screenshot, simply press the Print Screen button for a complete capture of the desktop. To grab the active app window, however, hold Alt + Print Screen. You can also screenshot a selected area with Shift + Print Screen.
Screenshot options can be found in the Activities overview. Here you can find the above options, which you should select before clicking Take Screenshot. The Save Screenshot screen will appear, letting you choose where to save the image. By default, this is the Pictures folder (this is where screenshots made with the keyboard shortcuts will be saved).
In addition, it’s far easier to record your desktop. All you need to do is hold Ctrl + Alt + Shift + Print Screen to start recording. A small red circle will appear in the top-right corner of the screen as recording takes place. Once you’ve captured the activity you want, press the keyboard combination again to stop recording.
Video captures are saved to the Videos folder, with filenames in the format screencast [date] [time]. They’re saved as WEBM files for easy sharing, but can easily be converted to MP4 or some other format with a conversion tool.
Ubuntu 18.04 LTS: New Version, New Features!
It’s always worth upgrading to an LTS release of Ubuntu. In 18.04, you get the benefit of these new features. To recap, they are:
- Revised GNOME desktop interface.
- Middle click the mouse.
- Easier way to install PPA applications.
- Use minimal install for speed.
- Check your GNOME version.
- Easily record screencasts and screenshots.
If you haven’t already upgraded, now is the time. And if you can’t, you may need to upgrade to Ubuntu 17.10 first. Otherwise, simply back up your files and folders and perform a full install of Ubuntu 18.04 LTS.

