You probably know that you can change the privacy settings of your Facebook profile to limit who can see it. But what if you just want to make certain posts private and not your entire profile?
You can do that too. Here’s how…
How to Access Your General Facebook Privacy Settings
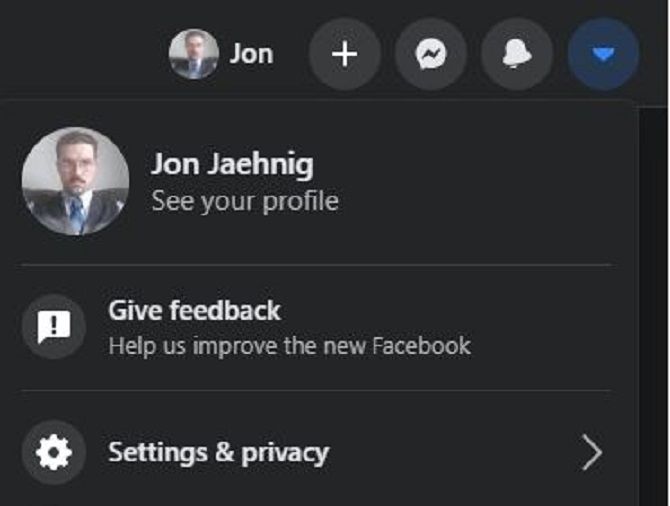
To make privacy changes that affect your whole timeline, access your general Facebook settings by clicking the small arrow icon in the upper-right corner of the screen and selecting Settings & privacy from the dropdown menu. Then head on over to Settings.
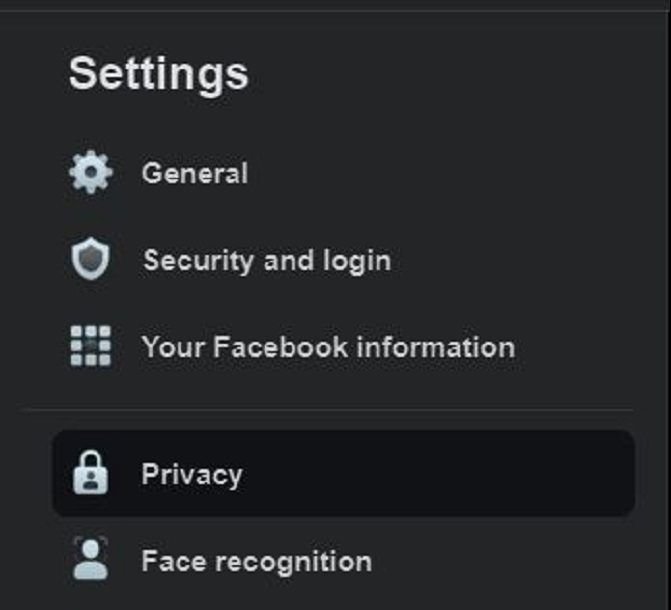
From this menu, select Privacy. This takes you to the privacy dashboard. This page lets you control a lot of different things, so you will have to scroll down to access certain settings.
Setting Your Privacy for Past and Future Facebook Posts
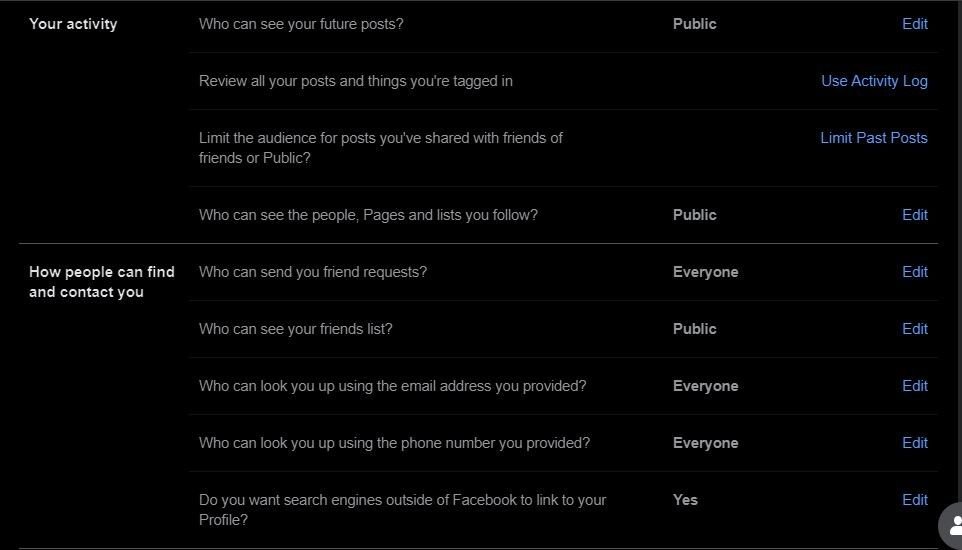
This dashboard is where you’ll find more specific privacy controls. In the Your activity section, you can limit the audience of past posts. You can access this setting by clicking on Limit Past Posts.
You can also review posts that you’re tagged in by selecting Use Activity Log. If needed, you can limit the audience of these posts or remove the tags.
These settings work retroactively, allowing you to change who can see things that you have already posted on Facebook. There are also steps that you can take to delete old Facebook posts once and for all, but that’s beyond the scope of this article.
You can change the settings for all future posts, by selecting Edit next to the Who can see your future posts text field.
Advanced Privacy Controls for Facebook Posts
The privacy menus that we’ve been looking at so far have been pretty general. But Facebook also offers more advanced settings.
By exploring the Public posts menu and the Timeline and tagging menus, you can access more context-specific settings. This helps give you more control over your own posts as well as how other people use your content.
How to Change Public Posts Settings
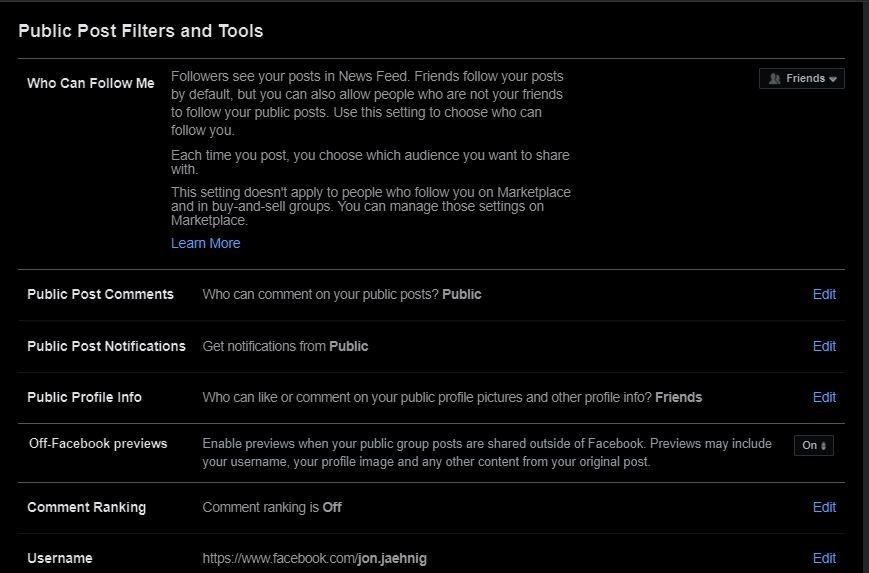
Even when you choose to make some posts public, you can adjust controls to change just how public they are. For example, you can choose whether people can comment on these posts.
By selecting Public posts, you can access Public Post Filters and Tools. In addition to controlling who can follow you at all, you can control who can comment on your posts and how people can interact with your public information.
This is an important distinction, because your profile information, while potentially being some of the most sensitive information on your whole account, isn’t protected in the same way that text posts and general images are protected.
How to Use the Tagging and Timeline Settings
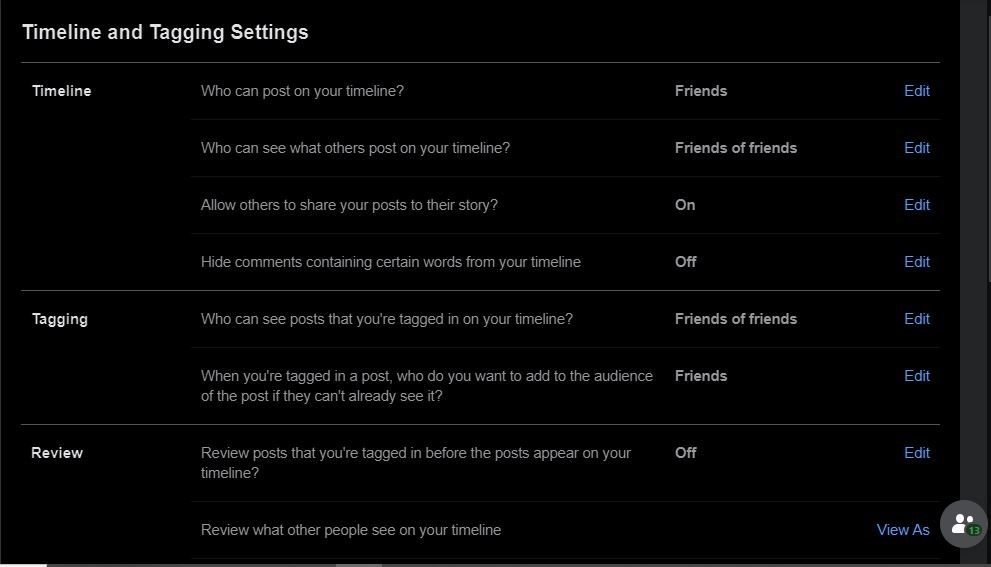
The settings that we’ve seen so far largely control how you can adjust settings for your own posts. But with Timeline and Tagging Settings, you can adjust the permissions for posts shared by others on your timeline. This includes who can post on your timeline and who can see what others have posted on your timeline.
Meanwhile, you can enable the Review setting to make sure that you can approve posts that you’re tagged in before they show up in your timeline.
You can always check what’s visible to different groups of people by using the View As tool under the Review section. This lets you see your profile as a specific type of user—such as a Facebook friend, a friend of a friend, or a public user.
How to Manage Privacy Settings on Single Posts
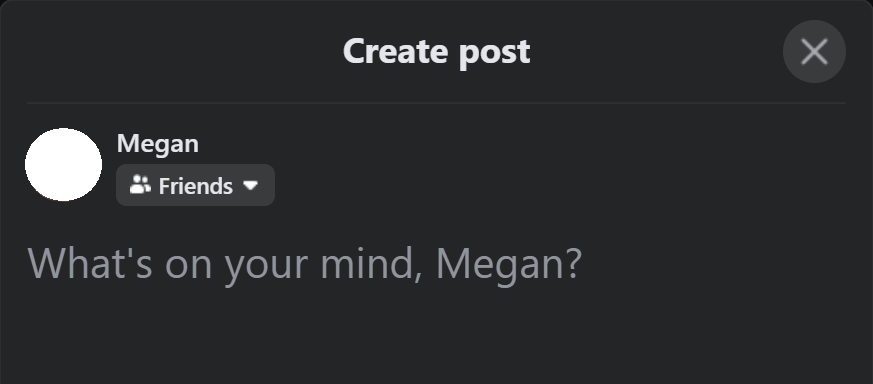
If you want to make one post that is more public or private than the rest of your posts, you can manage the privacy setting of that post individually without changing your general settings.
To do this, select the What’s on your mind? text field on your timeline, page, or profile to open the Create post text box.
Under your name (or the name of your page), you will see your current post privacy setting. Selecting this field opens a privacy menu that only affects that post.
Facebook Post Privacy Categories
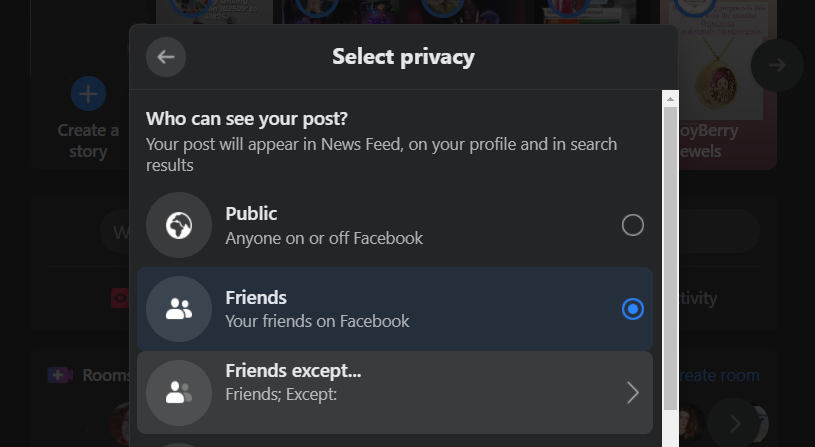
When adjusting privacy settings for an individual post, you will get a few options for who can see the post.
This includes the following options:
- Public: Public posts can be seen by anyone, including people who don’t have a Facebook account.
- Friends: These are the people that you have accepted friend requests from directly.
- Only Me: Only you can see the post.
- Custom, Specific Friends, and Friends Except: A range of customized options for who can see a post, with the ability to exclude specific Facebook friends.
The Custom selection opens two separate fields, one for friends that can see the post and one for friends that cannot. Be aware that who can see these posts can change later if excluded Friends are later tagged in the post.
The Specific Friends option allows you to select specific friends who will be the only people able to see the post. It’s handy for things like inside jokes that don’t come up often enough to warrant creating a group.
The Friends Except option is just the opposite and allows you to select which friends won’t be able to see the post. Ideally, people use this feature for things like planning surprise parties.
The Close Friends selection restricts the post to your already existing list of close friends.
Only Me allows you to create posts that no one can see except for you. This may seem silly, but it can allow you to take personal notes that you can check back on later, save items to your page without sharing them, and celebrate personal milestones that you don’t care to have others engage with.
Considering the multitude of ways that Facebook invades your privacy, it’s good to understand that various audiences you post could potentially reach.
Fighting for Your Facebook Privacy
Facebook has a checkered past when it comes to privacy, and all of us have had negative interactions with internet trolls or passionate acquaintances. However, there’s too much value in a profile for most of us to go without one.
So, instead of deleting your Facebook, spend some time exploring how you can protect your profile or page. Understanding how to limit specific posts will also give you more power over the content you share.


