Android gives you a wide variety of options for customizing your phone, and changing your ringtone is one of the most enjoyable.
As you might expect, you have many options for changing your phone’s various alerts and tones from the default options. With a bit of work, you can use your own track as a ringtone. Even better, you can apply custom ringtones to specific contacts. And don’t forget about custom notification sounds!
Let’s go through how to create and set custom ringtones and notification sounds on Android one by one. We used a OnePlus 6T as an example here; your phone may look slightly different.
How to Create Ringtones Using Your PC
Most people keep the bulk of their music files on a computer. To convert one (or more) music tracks into your phone ringtone or notification sound, use the following steps.
(Not sure what sounds to start with? Check out retro video game sounds that make great ringtones.)
- Download the free audio recording and editing desktop app Audacity.
- Install the LAME MP3 encoder library, which will allow you to export files from Audacity in MP3 format.
- Launch Audacity and open the source file by going to File > Open. You can also drag and drop a track into Audacity if you prefer.
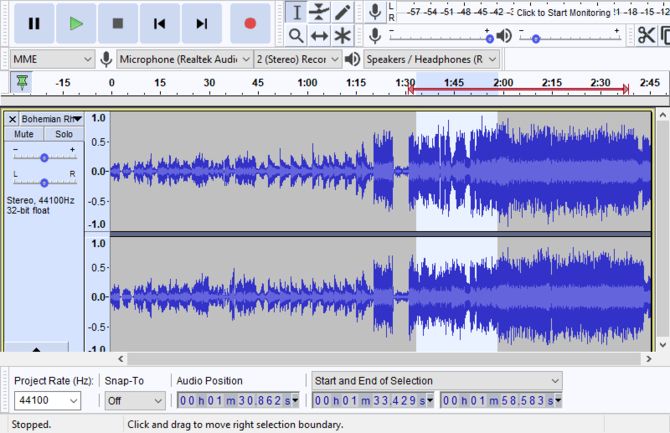
- Use your mouse to highlight the section of the song you want as your ringtone and press Ctrl + C to copy it. You can click the Play button to preview the selection.
![select section of file in audacity]()
- Press Shift + C or click the X at the top-left of the current track to close it.
- Paste the selected portion of the music file into a new track with Ctrl + V.
- If you wish, you can use the Effect menu to make further changes to the audio. Use the Amplify option to boost the volume, or Fade In/Out to make the tone start more gently.
![use effect to edit audio track]()
- When you’re done, save the file to your computer with File > Export > Export as MP3. Give it a descriptive name and you’re all set to put it on your phone.
How to Transfer Ringtones to Your Phone
Now that you’ve created the perfect ringtone, you’ll want to get it on your phone. If your PC has Bluetooth support, it’s easy to transfer the files this way. Follow our guide to connecting your PC and phone with Bluetooth first.
Once that’s done, walk through the following steps:
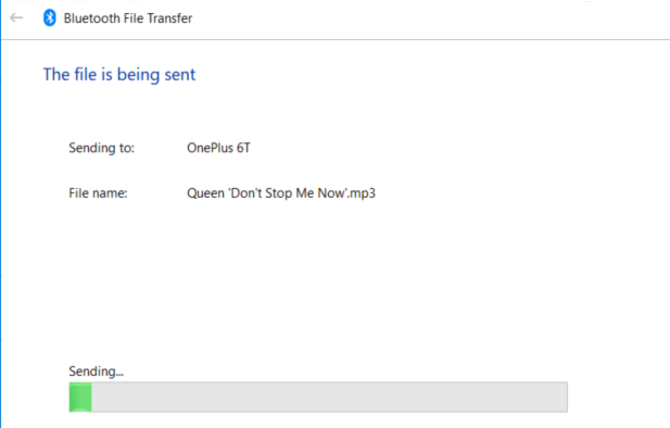
- On your PC, right-click the ringtone file you created earlier. Choose Send to > Bluetooth Device and select your phone.
- Tap Accept on your phone for the incoming file.
![file being transferred via bluetooth]()
- The file will be saved to your phone’s storage in a folder called bluetooth.
If you prefer, you can also transfer the ringtone file to your phone using a USB cable or one of the many other file transfer methods.
Regardless of how you transfer the audio files, you’ll need to place them inside the correct folder on your phone. This requires an Android file manager app. FX File Explorer is a good free choice if you don’t already have one.
Locate the audio files in the bluetooth, download, or whatever other folder you placed them in when you transferred them. Then move them into the Ringtones or Notifications folder (depending on the type of sound they are). After you do this, you’ll be able to choose them from your list of installed ringtones.
How to Find Ringtones on Your Phone
If you don’t want to create your own ringtones, don’t worry. You can grab thousands of ringtones and notification sounds right on your device thanks to an app called Zedge. This lets you quickly download ringtones from movies, video games, memes, and more.
To find new ringtones after downloading and opening Zedge:
- Tap on the three horizontal bars icon in the top-left corner.
- Select Ringtones or Notifications based on what you’re looking for.
- You’ll see featured sounds as well as breakdowns by category. Browse around until you find one you like.
- If you don’t see anything notable, use the Search icon to find what you’re looking for.
- On a ringtone’s page, tap the Set button at the bottom. You can set it as your Alarm, Notification, Contact Ringtone, or Ringtone.
- If you’d like to save a tone for later, tap the three-dot Menu button at the top-right of a ringtone’s page. Then choose Download to place it inside the Zedge folder in your phone’s storage. You can move them to the appropriate folders later, as described above.
How to Edit Ringtones on Your Phone
Most ringtones on Zedge are of decent quality and ready to use. But if you want to make changes to a tone before you assign it, Ringtone Maker can help.
This app is capable of creating ringtones, alarms, and notification sounds from multiple audio file types. You can use it to edit audio on your phone, perhaps to boost a track’s audio, trim silence, or similar.
To edit a ringtone using Ringtone Maker:
- Open the app; you’ll see a list of audio files on your phone.
- Tap the three-dot button to the right of the file you want to use and choose Edit.
- You’ll then see an audio editing screen. Here you can adjust your audio to create a better ringtone as needed.
- Drag the handles to change the start and end times. Tap the Volume icon in the top-right to fade in/out or adjust volume.
- When you’re done, tap the Save icon and use the dropdown to save the file to the Ringtone, Alarm, or Notification folder.
Now your edited audio file will be ready for you to assign using the steps below.
How to Change Your Ringtone
Now that you’ve transferred your ringtone to your phone, or downloaded and edited it, you’re ready to actually set your ringtone. Here’s how:
- Go to Settings and tap the Sound entry. This may differ (perhaps Sound and Display or Personalization) depending on your phone.
- Tap Phone Ringtone, Default notification sound, or Default alarm sound depending on what you what to change. This will take you to a page containing a list of preinstalled tones as well as ones you’ve added.
- Tap on a ringtone to listen to it. The selected ringtone will show a blue dot next to it.
- When you’ve decided which one you like, tap Back. Depending on your phone, you may need to tap Save first.
- You should see the text under Phone ringtone (or your chosen category) reflect your new tone.
If you don’t see your custom tone in the list, make sure you’ve put it in the right folder as described above.
Set a Custom Ringtone for a Contact
If you want even more customization, try assigning a specific ringtone to a contact. When that particular contact calls, you’ll know who it is just from the tone.
To set a contact’s ringtone:
- Open the Contacts (or People) app.
- Select the contact you want to use a custom ringtone for.
- Tap the three-dot Menu in the top-right corner and choose the Set Ringtone option.
- Here, simply choose a unique ringtone for the contact.
Don’t Forget About App Notifications
Most apps let you choose a unique ringtone or notification tone for different types of alerts, too. If you’re running Android Oreo or above, check out our guide to Android notification channels to see how this works.
For those not on Oreo yet, or if you have an app that doesn’t work with that function yet, check the Settings menu of the app. Many apps have a Notification Settings or similar entry that lets you adjust what alert plays. If you set up custom alerts for many apps, you’ll know what notifications are without even looking at them.
Choosing the Perfect Ringtone
Your ringtone is an important part of your phone, and now you know everything you need to make it personal. Before you go, we have a few recommendations to consider while choosing a ringtone:
- A ringtone shouldn’t convey a specific emotion, as it might set the wrong mood for the call.
- It should be easily distinguishable, in case you’re in a crowd where many phones could ring.
- The tone should not be too jarring. In case it accidentally interrupts your sleep or a meeting, you don’t want it to be extremely annoying or embarrassing.
- However, make sure it’s also not too gentle or soft. This might make you miss the sound when you’re busy.
Still struggling for ideas? Remember that your custom ringtone doesn’t have to be a song. If you don’t mind going retro, why not choose from a variety of free mobile ringtones that sound like real phones? These ringtones stand out in a crowd while reminding you of the pre-smartphone days.
Read the full article: How to Install and Customize Ringtones on Android Phones


